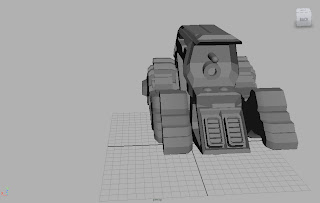
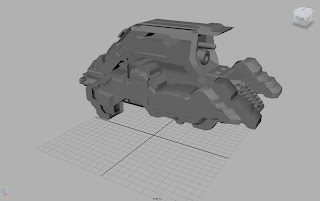
It was decided that Alex's concept was the best vehicle design that would fit in with the mining environment, and I volunteered to construct Alex's concept in 3D using Maya.
Using Alex's Concept Illustration of the mining vehicle at the very bottom of this post, I have managed to create a 3D model of his design, despite the fact that I had no front view reference.Wireframe.

The images above are screen captures of the complete 3D model of the Ground Transport Vehicle with wheels. The reason why it was agreed there would be no tank tracks is because none of us had a clue how to animate tracks effectively. However tracks would be far more use than wheels in the desert as tracks would increase surface area thus preventing the vehicle from sinking into the sand. But this is a student project and is completely science fiction so we shall get away with it. Plus in the final stages of animation using after effects we shall create dust trails and sand clouds to hide the wheels of the mining transport vehicle. So putting all that effort into building tank tracks would be somewhat pointless as the wheels will be hidden from the viewer. The dust clouds must be included anyway as this would demonstrate that the landscape consists of sand and would indicate the realistic motion of disturbed loose sand.
I also widened the vehicle because I thought the initial model was a little too thin. I wanted the vehicle to seem heavy, bulky and heavily armoured with thick metal plating. I am very pleased with the finished result as it is very close to Alex's design. I certainly learnt a lot when modeling this vehicle in terms of understanding how to manipulate vertex's, using the insert edge loop and split polygon tool and extruding faces. I did discover however that I should have created my model by keeping polygons to a maximum edge limit of four. Alex Hulse explained that various polygons crucial to the vehicle's geometry had far more than four sides. He explained this may lead to "lag" or "delay" when navigating the model and may increase render time and cause lighting issues due to as he put it "illegal polygons" and "distorted normals". I took this on board and used his solution which was to either manually create new polygon edges or use the triangulate tool which adds edges automatically. This was a vital piece of information, I definitely learnt something from what Alex Hulse said. Despite the fact that this was my first decent model that I was happy with, in future I will make sure that I use Alex's tip and create models with reliable polygons.
I shall carry out some occlusion renders of this model to emphasise its form through light and shadow.


Alex's original vehicle concept.


Alex's original vehicle concept.
Image Plane & Texture
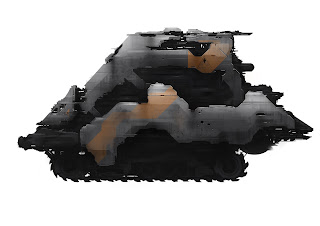
 The image above was the texture I decided to use and apply to the 3D model as I wanted the vehicle to look as close to the original design as possible. Also I wanted the design to match that of the IPMC transport ship. I simply used the UV planar map tool to apply the texture on to the side of the vehicle.


No comments:
Post a Comment