We had to compress our film using QuickTime and thus the quality was significantly reduced and in areas there was some pixelation which I was not too happy about, however there was no way around this problem as our film was very large in terms of memory. Despite this I am very happy with the overall outcome. I am also pleased that almost every single model was included in the finished film and barely anything was scrapped.
Friday 5 March 2010
Submission
I am very happy with the project we have managed to complete. It was a very ambitious project however we managed to complete the project in time and still achieve the look and feel we wanted. Our project looked professional and included high quality models.
Thursday 4 March 2010
Feedback
Wednesday 3 March 2010
Project Evaluation & Learning Outcomes
I thouroughly enjoyed this project as it was a subject that suited my interests, however this project also provided me with the opportunity to learn from other team members skilled in different areas. I learnt a lot regarding modeling, and I believe I have greatly improved in building 3D models within Maya. I have learnt how to apply textures to my models effectively using the UV Planar Mapping function so as to avoid nasty stretched textures. I now understand the way the hyper-shade editor works and how important it is to name every different texture.
I have learnt how to carry out simple animations. I have learnt how to set up cameras and change their projections and settings. I have learnt the basics about setting up lights within Maya and how to change from one type of light to another as well as changing their settings to light my models effectively and suggest form using light and shadow. This project has also improved my concept design skills in Photoshop, it has improved my compositing skills in Adobe After Effects and I feel more comfortable using the program. I believe that I have become more proficient in editing in as far as timing, rhythm and tempo between shots. I am now more familiar with Final Cut Pro.
This experience was a sometimes stressful yet enjoyable one and will undoubtedly help me next term and has informed me of what to expect next year during the third year. I was fortunate to work with such a talented yet friendly group of individuals who were determined to finish the project. We all had a shared vision and the end product demonstrates that we gelled well as a team. This project has also made me realise how much more I enjoy working in a group. This project has also showed me of the different processes needed in order to create an entirely 3D environment and how much work must be put in in order to achieve the desired product.
Individual Evaluation
As an individual I learnt a lot from this project both in terms of time management and communication to the more technical side in terms of techniques and skills.
The one thing that I should critisise myself for was the fact that I spent too long focusing on the conceptual stage. In the future I must remember to realsise that there is more than just conceptual design. Despite the rather long pre-production stage however, we still managed to finish our project, yet it is something to bare in mind. Having said this I came up with various designs and worked well as a conceptual artist and I believe I contributed to the designs of various elements within the environment. I gathered substantial amounts of research for the team and explored various environment designs. My storyboards however were probably the most important pieces of work within the group as these strongly influenced the final look of the film itself.
Team Evaluation
Problems & Solutions
Communication:
Communication was one of the first problems we had as a group, however we quickly remedied this problem by exchanging mobile phone numbers and e-mails. W also decided to use online messaging applications such as MSN & Skype.
Texturing:
We have had some issues regarding textures when attempting to import a scene from another computer. This seems to be a rather annoying and frequent problem. One way we have solved this is to manually re-assign the textures, but this takes up valuable time. The other day Dan showed me and Tom a way to set the textures by setting the project scene and its textures under source images rather than documents. I have to say that I do not yet fully understand how the texture system works. I also understand that other students have been experiencing similar problems.
Rendering:
The other problem is that some of our scenes are far too complex for our laptops to render in terms of polygons and information. Sometimes it is due to a lack of memory or RAM. However we have solved this problem by dismissing the fly-through approach and exploring the environment by using numerous shots. Thus we do not have to render all the components within a single shot. We have also taken this a stage further by making sure that any environment components not visible within the camera frame are deleted to cut down render time and lag/ delay issues. There is no point in including elements which the viewer cannot see. This is precisely what they do in film, however from the experience on this project, I have realised that using this technique is even more important when it comes to CG 3D environments.
We have discovered that we cannot use the render farm effectively as Qube is only compatible with mental ray and only works with .tiff format textures. We have used many .jpg when texturing, and it would be a painstakingly slow process of re-formating hundreds of textures. There were literally thousands of errors that we would have to had to address. It has also come to my attention that during the last weeks Qube buckled under the pressure of too many projects being uploaded to be rendered which exceeded the memory limit. Numerous projects which were 4 Gb and over crashed the render farm, thus this is another reason why it was a good decision to render locally on our own laptops. Due to these problems we as a group made a conscious decision to render out each scene using our own laptop computers.
We have also decided not to render our scenes with an occlusion layer as we discovered that rendering this layer almost doubled render time. The result did not look too different from the
renders without an occlusion layer. The only way we could include an occlusion layer was by either rendering different layers separately of the same scene on several laptops simultaneously or the the render farm Qube was an option however I have already explained the issue with this method. So we decided to render without an occlusion render in order to cut down on render time.
Progress
I admit that there were on occasions, moments where I thought we were not going to complete our animated environment project or complete it to our liking and we may have spent a week more on concept design than we should have, but in my opinion this extra week provided us with adequate time to come up with some interesting designs. We supported and helped each-other to come up with solutions to quickly remedy a problem. Generally after these scares we focused our concentration and consequently completed a lot of work within a day, which provided a sense of accomplishment. Our project is a particularly ambitious one and has become a rather daunting project to complete during these last few weeks. It will be all the more rewarding once we finish the project.
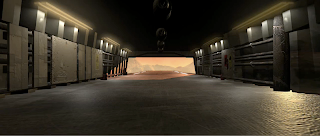
Below is perhaps my favourite shot of the whole film. This is because of its simple composition, superb lighting, high quality texturing and effective bump mapping. This shot is also very faithful to the original concept and storyboard. It almost looks as good as something from a game. I am very happy with this shot.
Sound Effects
I used sound effects to suggest things happening out of frame and thus enhance the visual experience. I attempted to use sound to make the environment seem larger, believable and realistic as possible. I wanted the sound to suggest animation both seen and unseen. For example I wanted tank track sound effects to be heard despite the fact that in some scenes the dump truck's wheels were not animated. I wanted the sounds to inform the viewer of how large the scale was of our environment. The wind sound effects worked extraordinarily well with the dust layers and certainly improved the exterior shots. I focused on using sound effects that would fit in the environment. I wanted the viewer to think that the sounds they were hearing belonged to the objects that were making them.
To me sound is 75% of the experience and I wanted it just right. Sound edited effectively can do wonders and enhance the visuals ten fold. I know we are not being graded on sound however not putting sound on to the final edit would have been a disappointment and would not have done the environment any favors. The sound files were perhaps the most expensive thing out of the whole project. All the sounds roughly cost about $30.
Adobe After Effects & Compositing
Here are some shots I managed to finish today in After Effects.
I really like the way this static shot came out. Although it is static, the dust layer really brings this shot to life
 This was a tough scene to do as I had to parent and animate the background layer and dust layer to the 3D desert terrain. It looks like a relatively simple shot however there are a lot of layers here. I took a photograph of my Dad's car's dashboard which can be seen at the bottom left of the screen, I believe this provides something familiar to the scene which the viewer can relate to, it also makes the interior less empty and more interesting and realistic. I also took film of a swinging card pass which hangs from the roof of the cockpit of the vehicle. This adds movement and additional animation to make the scene more interesting and to inject a little life to an otherwise dull scene. I also filmed a movie of my Dad to create the driver's reflection. This too helps to bring life to the film. The cockpit windscreen is a basic layer made in photoshop which was animated in adobe after effects to depict the illusion of uneven terrain and to give a sense of the motion of the vehicle. I also added soot near the corners of the panes of glass as extra detail to make the vehicle used and weathered. I was very pleased how the smoke/ dust layer turned out too. It was used throughout the short film, and helps to convey weather and enhance the atmosphere of the environment.
I was concerned that the sky was a little too pink so Tom and I graded it so that the background was more orange thus creating the illusion that the vehicle had orange tinted glass. This was as they say, a happy accident and seems to fit rather nicely. This scene looks quite decent and adds a new dimension to the film, it also seems to humanise the environment too.
Rendering
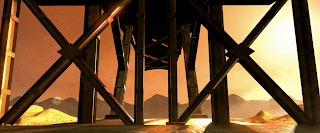
I was very happy with the render below. It is very close to that of the original shot in the storyboards. The reason why I like it so much is because of the use of lighting which illuminates areas of the communications mast, yet not revealing the poor texture that is applied. In fact, the poor texture is not really visible. This is why lighting can be so important.

Sunday 21 February 2010
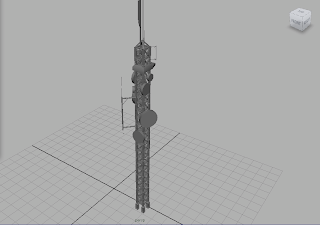
3D Communications Mast Model
Again I think too much detail was included in this 3D model of a communications mast. However I had a lot of fun building this model. I wanted it to be as realistic as possible. I used this model as a means to improve my modeling skills. To build this model I used various reference material. Although in most scenes this is in the background, I am still very happy the way this model turned out.

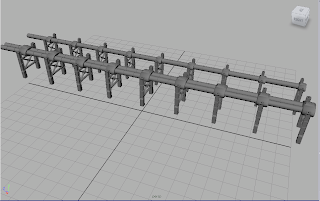
3D Pipeline Model
I think I went to town a bit too much with this model. However I did have fun modeling it. I went into a lot of detail using photo reference from numerous sources. I was focusing on improving my modeling skills.

Thursday 18 February 2010
Textured 3D Mining Vehicle Model
Below is a test render with a directional light. I wanted to make sure that there would be no problems when light interacted with the mesh of the 3D model.
 Below are a few images of the mining vehicle near its final stages of texturing. I have to admit that the process of texturing took a lot longer than I had anticipated and was much harder to grasp and understand. I had a lot of difficulty with planar and UV mapping. I was shown how to texture efficiently by both Alex and Andy. The best section of texturing was the vehicle's side texture. The textures to the sides of the mining vehicle came out really well and matched the geometry of the vehicle, however to the rear and top of the vehicle the texturing was a lot to be desired as there were texture stretch marks. However, that said, I do believe that this issue will not matter too much as the shots of this vehicle will mostly be from a low angle or from a distance so the texturing will not be easily seen. Plus half of the vehicle will be shrouded in shadow due to high contrast between light and shadow during the "golden hour"/ sunset.
Texturing this vehicle was a massive learning experience and I leant a lot whilst modeling and texturing this vehicle. For instance I leant the importance of naming different sections of geometry and naming different textures, I also discovered how to use the planar mapping function, I am also beginning to understand the way UV's work.


To make the vehicle seem used and interesting I added a few textures/ decals. Jared suggested that we attempt to indicate that our environment seemed busy and felt "lived in" and inhabited by miners. He suggested that we add character to the environment which would in turn create a more human and industrial atmosphere. The group agreed that we wanted to avoid our environment from becoming dead. We needed to give the environment some life or at least an indication of life. I decided to follow Jared's suggestion by adding these textures/ decals such as pin-up nose art, graffiti and hazard strips. As a group we also decided to dot other examples of posters, signs and graffiti around the environment to have that "lived in" feel.
Monday 15 February 2010
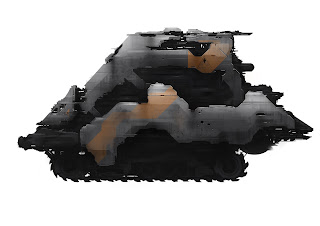
3D Mining Vehicle Model (Occlusion Render)
These are a few occlusion renders of the 3D Mining Vehicle. I am very pleased with how these renders came out. Indeed the contrast between the light and the shadows emphasise the vehicles form and where surfaces meet. This render option was entirely new to me and this was certainly something new I learnt today, and I am grateful for my brother and Andy for showing me how to execute an occlusion render.


Saturday 13 February 2010
3D Mining Vehicle Model
It was decided that Alex's concept was the best vehicle design that would fit in with the mining environment, and I volunteered to construct Alex's concept in 3D using Maya.
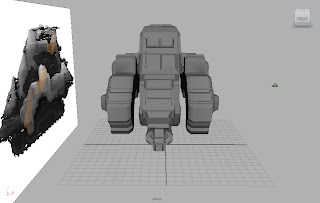
Using Alex's Concept Illustration of the mining vehicle at the very bottom of this post, I have managed to create a 3D model of his design, despite the fact that I had no front view reference.


Wireframe.
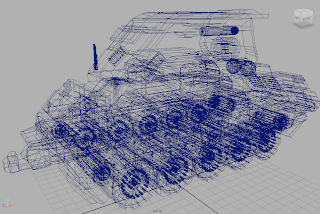
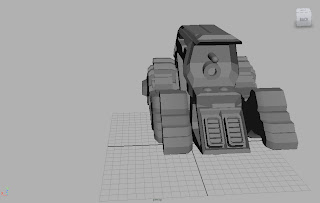
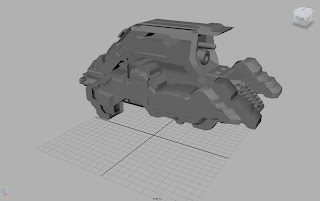
The images above are screen captures of the complete 3D model of the Ground Transport Vehicle with wheels. The reason why it was agreed there would be no tank tracks is because none of us had a clue how to animate tracks effectively. However tracks would be far more use than wheels in the desert as tracks would increase surface area thus preventing the vehicle from sinking into the sand. But this is a student project and is completely science fiction so we shall get away with it. Plus in the final stages of animation using after effects we shall create dust trails and sand clouds to hide the wheels of the mining transport vehicle. So putting all that effort into building tank tracks would be somewhat pointless as the wheels will be hidden from the viewer. The dust clouds must be included anyway as this would demonstrate that the landscape consists of sand and would indicate the realistic motion of disturbed loose sand.
I also widened the vehicle because I thought the initial model was a little too thin. I wanted the vehicle to seem heavy, bulky and heavily armoured with thick metal plating. I am very pleased with the finished result as it is very close to Alex's design. I certainly learnt a lot when modeling this vehicle in terms of understanding how to manipulate vertex's, using the insert edge loop and split polygon tool and extruding faces. I did discover however that I should have created my model by keeping polygons to a maximum edge limit of four. Alex Hulse explained that various polygons crucial to the vehicle's geometry had far more than four sides. He explained this may lead to "lag" or "delay" when navigating the model and may increase render time and cause lighting issues due to as he put it "illegal polygons" and "distorted normals". I took this on board and used his solution which was to either manually create new polygon edges or use the triangulate tool which adds edges automatically. This was a vital piece of information, I definitely learnt something from what Alex Hulse said. Despite the fact that this was my first decent model that I was happy with, in future I will make sure that I use Alex's tip and create models with reliable polygons.
I shall carry out some occlusion renders of this model to emphasise its form through light and shadow.
Alex's original vehicle concept.


Alex's original vehicle concept.
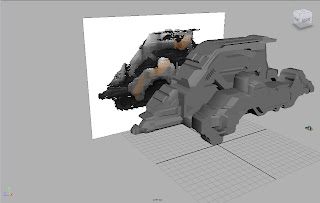
Image Plane & Texture
 The image above was the texture I decided to use and apply to the 3D model as I wanted the vehicle to look as close to the original design as possible. Also I wanted the design to match that of the IPMC transport ship. I simply used the UV planar map tool to apply the texture on to the side of the vehicle.
Thursday 4 February 2010
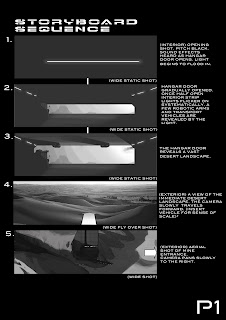
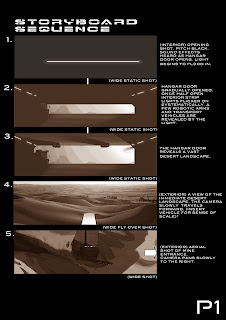
Storyboard Sequence
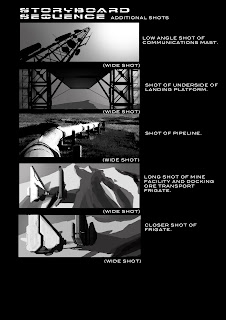
Below are all my own storyboards. These images show the progression of the initial idea for the animated mining environment sequence. Rather than having a fly through, I decided to have various different shots, either static shots or slight pans of the environment. Pretty much all these shots are wide shots so that vast scales are emphasised and all the components can be seen clearly and are not obscured. The wide shots will look very nice with widescreen format thus producing an aesthetic cinematic format.
Rough Line Storyboards

 Rough Shaded Storyboards

Refined Digital Storyboards (Greyscale)

Refined Digital Storyboards (Colour)
 I was not sure about the ending above. It seemed weak and lacked enough emphasis of a journey or narrative within the boards. Thus I spoke to the group and consulted with Jared to acquire their opinions and advice. As a group we decided that there should be a narrative depicting a journey of the mining vehicle towards its destination which would be the aperture mining entrance leading to a secondary excavation. Below is the revised board which show a shot of the mining vehicle interior looking out on to the vast expanse of a sandy desert. The next two shots depict the vehicle waiting for the aperture door in the rock face to open. The final shot is from the point of view of the vehicle moving down the dark tunnel interior rimmed with strip lights. The shot then fades to black.
Revised Board Page 2 Edit (Greyscale)

(Colour)

The board sheet below depicts a few ideas I had for additional shots that could be included for establishing shots. These are shots purely for showing off our modeling and lighting, depicting the scale of the environment and creating an aesthetic quality to the short film.
Additional Shots (Greyscale)
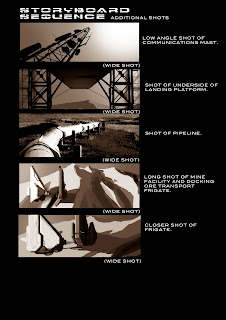
(Colour)
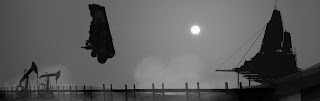
Establishing Shot Concept
Greyscale
The shot below basically was an idea to inform the viewer of the whole environment. I had doubts whether we were going to be able to render this scene with all the components. There was the option to render using layers of course but this would have taken time. We decided to render this scene with no 3D animation and decided to cut down on some elements. We decided to remove the oil wells and the pipeline from the shot. This was only a guideline for the desired shot, thus the final rendered shot looked radically different in terms of camera angle, distance and composition.
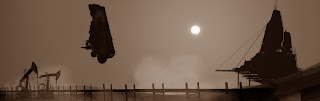
Colour
It was encouraging to hear from both students and tutors that my boards were very professional. I must be doing something right. I wanted the shots to be relatively simple and focus particularly on displaying our models in an artistic way by paying attention to balanced composition. The other component that will be key to our success is lighting. I have attempted to incorporate what the "Golden Hour" may look like within our environments in the boards. These shots were inspired by the cinematic experience and by photographers/ directors such as Stanley Kubrick.
What I believe I have done well in these boards is to portray the vast scale of our environment, but most importantly depicting our environment using effective camera angles and composition to present our work in an aesthetic and interesting way, which hopefully will be entertaining to the viewer as they are lost in a new world of imagination based on something quite familiar yet presented with a futuristic science fiction slant. I want our piece to be thought provoking regarding resource consumption today, but above all I want our piece to look slick and arty. Using shots such as these will undoubtedly enhance our designs and make them seem more professional. However I am a little concerned that I have been unadventurous with my camera placements. Perhaps I should have incorporated more close-ups, but I guess that close-ups could pose a new problem as bad texturing will be able to be seen.
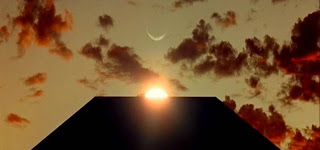
An image from 2001: A Space Odyssey
The image above and others like it were used as inspiration in order to prepare well balanced shots for our short animated mining environment.
Although at first I thought it unnecessary to produce an animatic for our animated environment, Ben explained that it would be useful in helping to see what our final short film will look like and thus will give us an idea of how to assemble the short film. He explained that we could use the animatic as a guideline so that we will be able assemble the final short film quickly and efficiently. Ben explained that he would use each cell of my original storyboard to form a simple animatic. He stated that he would concentrate on demonstrating camera movements.
Lighting Suggestion: Sunset (Magic Hour/Golden Hour)
I believe our environment would benefit from being lit during the Golden Hour or Magic Hour. I feel that our 3D model of the mine and the surrounding landscape will look far more interesting using strong contrast in as far as lighting. Golden Hour is the first and last hour of sunlight during the day. This is when lighting is softer, more diffused and warmer in hue and where shadows are longer. Strong highlights and dark shadows will help to enhance our model and define its shape. I believe that attempting to light our model during the day such as noon will make our model look flat and dull as there are few shadows.
I have collected some lighting reference during sunrise and sunset which may help us to visualise our model lit in an interesting way.
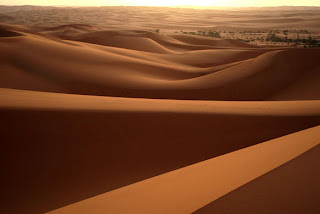
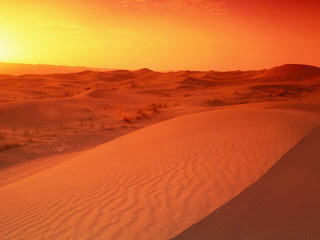
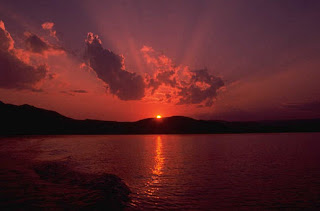
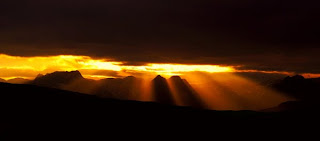
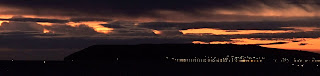
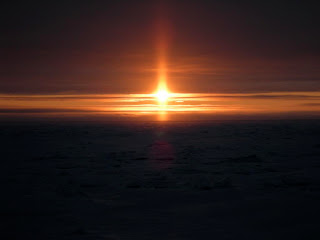
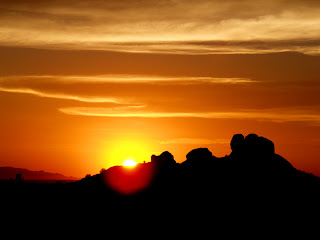
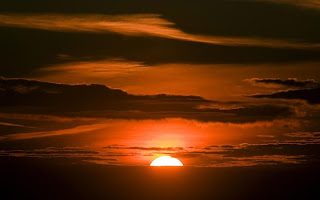
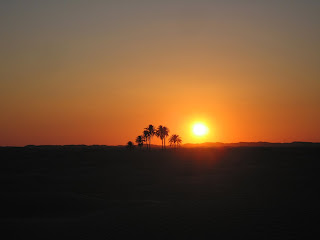

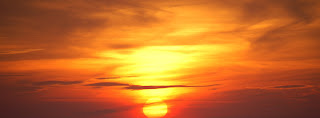
I have looked at these images from the internet for reference in particular as they are incredibly beautiful. I love the colour of the sky and how the surroundings consist of reds, oranges, and yellows. This is precisely the sort of lighting I want to include in he final film.
Subscribe to:
Posts (Atom)
